Congratulations on your decision to create your own blog, I hope by this time you have already have and understanding on what topic your blog is going to be about and you are ready to get things started. If you haven’t made any decisions yet you can check out my previous article which will help you to decide about what topic your blog should be about. Now its time to set the foundation of your blog, there are two important things you will need to start a blog.
- Domain Name
- Web Hosting
Domain Name
Your domain name is the name of the website you will need. For example our blog’s domain name is DxbBlog.ae . In the same way you will need a domain name for your blog as well, So people can type your blog domain name in the browser to open and read your blog. Normally a domain name will cost you around $10 for a .com domain, The domain name prices may very based on their TLDs however here in this article we would be discussing how you can get a domain for free with your hosting package.
Web Hosting
Web hosting is the most essential part of setting up any blog, this is the place where all your blog files, images and other blog files would be hosted and stored. In simple words, you are renting out a space in an online server where you are going to host your blog, so that people can visit your blog. For web hosting I would recommend using Blue Host, It will cost you only $3.95/Month which is around AED 14.51/Month and offers you a free domain for a year as well. They also offer you a 30days money back guarantee which means if you change your mind within 30 days you can receive a full refund on your hosting service.
For this example I would choose the simple plan with Blue host. With this plan I will be getting 50 GB of website space space, which should be more then enough for a start and intermediate level blog.
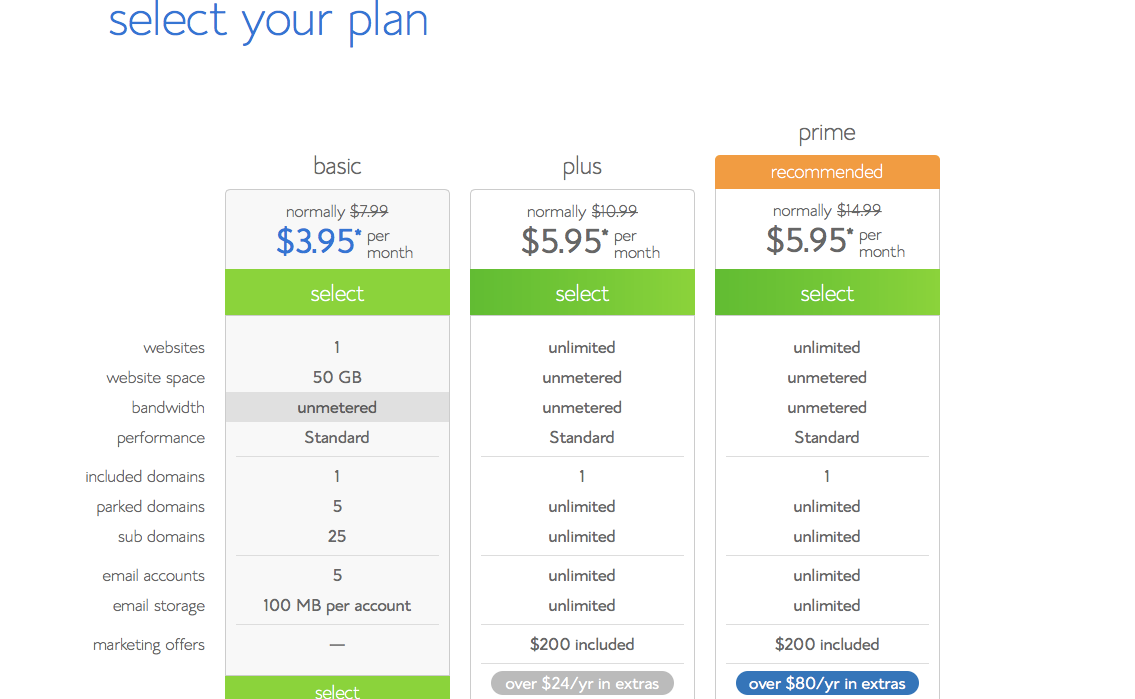
Blog hosting plans
After you have chosen the plan you will be taken to the next screen, where you will have to select a domain name for your blog. If you have already bought one you can use “I have a domain name” Option, otherwise you can buy a new domain using “new domain” which will give you a free domain which you can register. Enter the desired domain name and click next. You can use your own name or nick name as your blog domain or you can also use domain related to your topic for example our blog domain “DxB Blog” is similar to Dubai Blog.
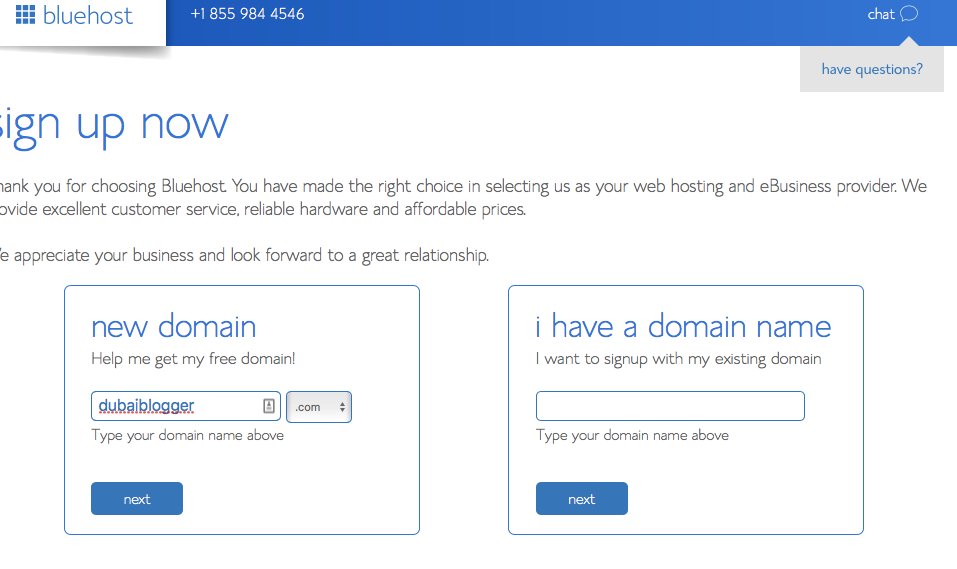
Select Domain name for the blog
In the next step, if your chosen blog name is not available you will be given more options or you can change your blog name to check its availability for example here dubaiblogger.com wasn’t available so after 5 minutes of searches, I was able to find dxbstories.com available, then you will need to fill up the signup form and enter your payment details.
Once you have signed up and made the payment you will receive an email where you will be provided with the CPanel Login Information, You will need to keep that information safe and we will need it for future.
Uploading Wordpress files on your hosting
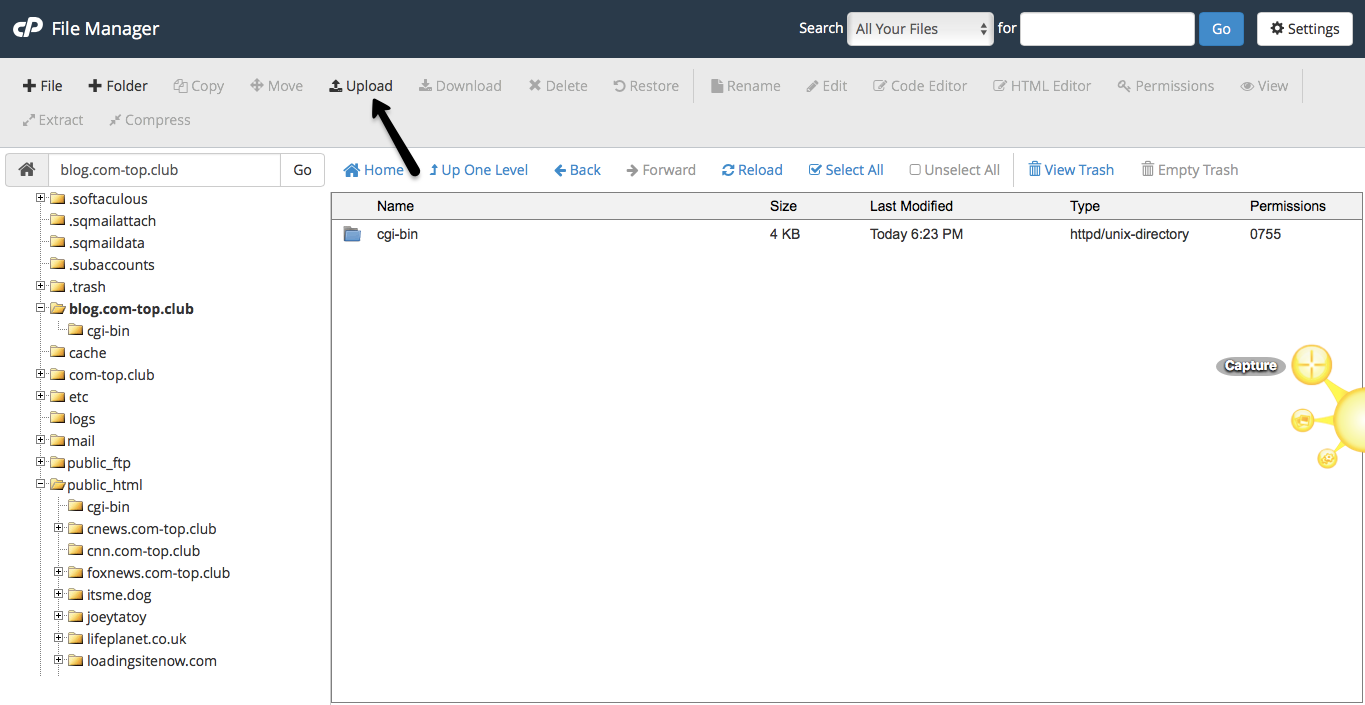
Wordpress is the content management system which we will need to publish content and handle content on our blog. WordPress makes it easer for anybody to start a blog without any technical knowledge and that is why we are going to use WordPress; using the CPanel details you were sent to your email address by blue hosting and log-into Cpanel. Once you are logged into Cpanel you should be able to see a screen like the screenshot given below, It could be different as well, but what you are looking for is option under the “Files” Box called “Files Manager” as shown in screen shot below
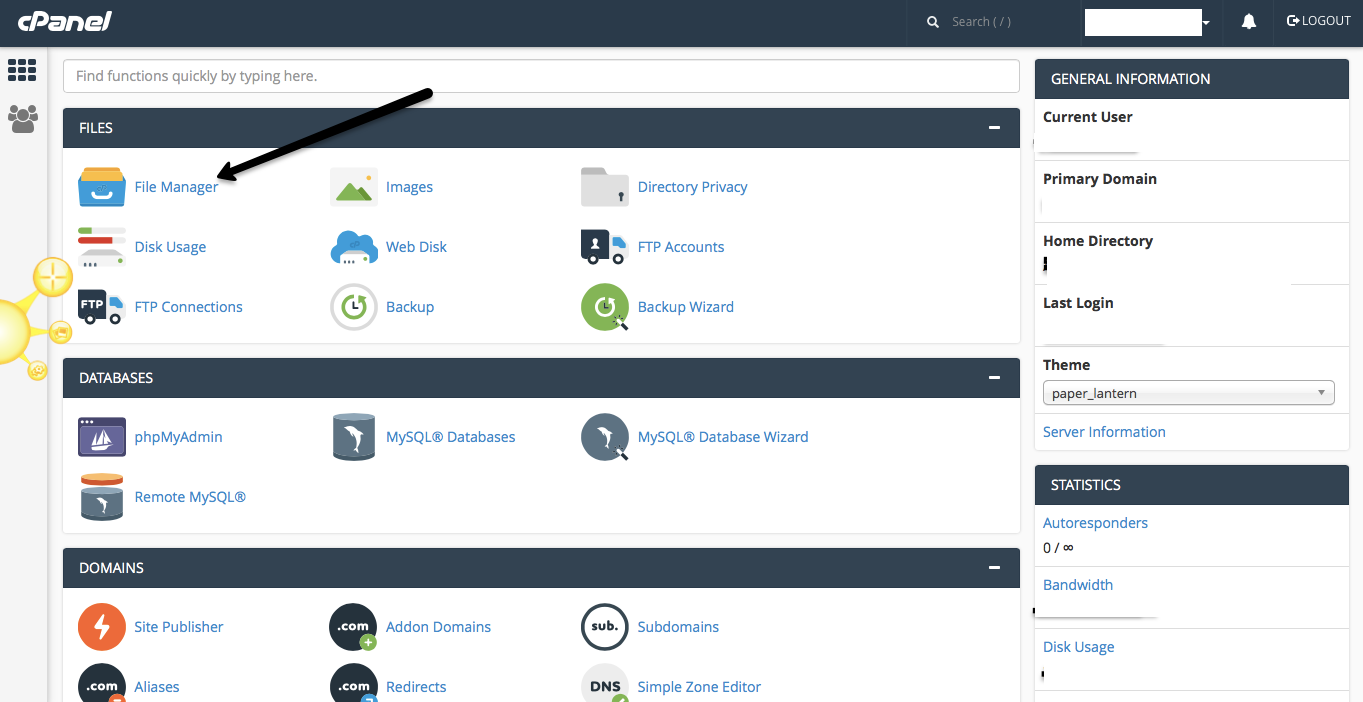
File manager in Cpanel
Once you click that a new window will open where you will have to look for “public_html” directory in right side of the window,
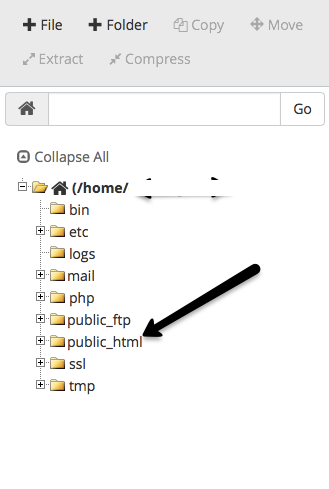
public html directory
Now a new directory will open where you need to upload WordPress files, Visit WordPress download page and download all WordPress files in your computer. Next, go to file manager once again where you had public_html opened and upload the whole WordPress zip file.
WordPress upload on File manager
Once file is uploaded go back to ” public_html ” and Extract the contents of the file by right clicking on the zip file and selecting extract option. Once complete you will see a new folder with the name of WordPress , Open the folder and select all the contents of the folder, Right click and choose move , A new popup will show you the list of files being move and also it would show you file path which should say “ the path should look like this /public_html/wordpress remove the “wordpress” part and make it like this “/public_html/” and click move .. you will see all the files have moved to public_html folder, Now its time to Install the database for the WordPress.
Database setup for WordPress
Now once all the files are uploaded next step is to setup WordPress data base, For this purpose we will go back to Cpanel Main Menu and under Databases menu select “MySQL Database Wizard”. (Make sure you note down all the usernames and passwords for databases and users you create in this process as you will need them in further processes) In Step1 it would ask you for database name, You can give it any random name for example here i am giving it quidsurv_xxdds332 name . In the next step I will have to create a user for the database; create username and passwords ( Make sure you note down all the usernames and passwords ). Once you have entered all info click on create user. Finally, give all privileges to the user you have just created for the database and click next- Make sure you have the database name, User name, and User password with you for the next step..
Installing WordPress
Now that you have uploaded WordPress files on your web host created database and data base user for your WordPress blog the Final step is to install the WordPress blog. You will need to visit the domain you registered for your blog. For example yourdomainame.com , Once you visit your domain you will see a WordPress message asking you to select the language, select the language you want for your blog and click continue. On the next page, WordPress will tell you a list of details it needs for the installation , These are the same details we entered during the database creation step, you will need to fill in;
Database Name: The name of the database you created in last step.
Username: Your database username you created in last step.
Password: Your database password you created in last step.
Leave the two options below without making any change
Database Host: localhost
Table Prefix: wp_
Wordpress will now test the details you provided and if they are correct you will see the screen telling you everything is set, Click Run The Install and on the next page Add title of your blog, Username and password for your login to the blog and also provide your email address. Click on Install WordPress to finish the installation. Once installed the you should be able to log-into your WordPress blog on this URL www.yourblogdomainname.com/wp-admin/ . Replace “yourblogdomainname.com” with your own domain name URL!
For now your blog is installed and my next post will be about how to Install new themes on your blog and how to change its look. Let me know if you have any questions or you need any help feel free to comment, We also provide Blog Installation service so feel free to contact us incase you need any help !


